
How to Categorize Your Products?
Categories help you organize inventory efficiently for faster browsing and filtering. Group similar equipment together—cameras and lenses under camera equipment, tables and chairs under furniture—making navigation intuitive for everyone using your rental system.
Why Use Categories?
Categories make it easy to browse, filter, and manage your inventory. Instead of scrolling through hundreds of mixed items, group cameras under “Photography Equipment” and tables under “Furniture.”
Categories also unlock Custom Fields — extra attributes (like lens mount, seating capacity, or voltage) that apply only to assets in that category. See Custom Fields below.
Permission note: Adding and editing categories requires the Assets Write permission (not Settings Write). If the Add category and Edit buttons are hidden for you, ask your administrator to grant it.
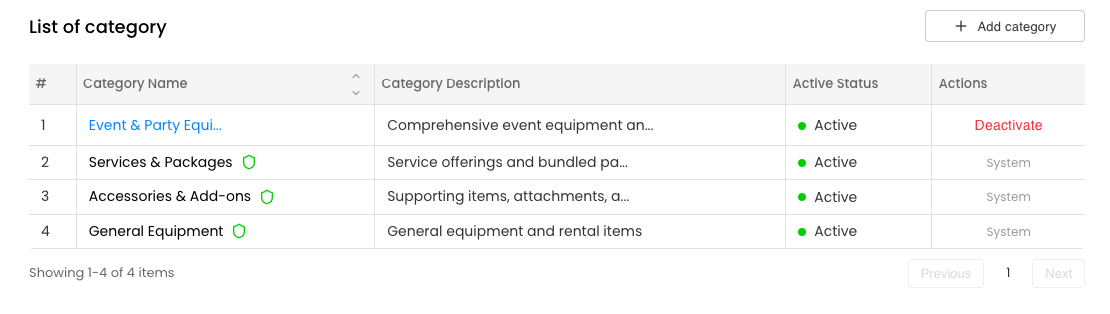
Navigate to Settings → Inventory Setup → Item Categories.
Create a Category
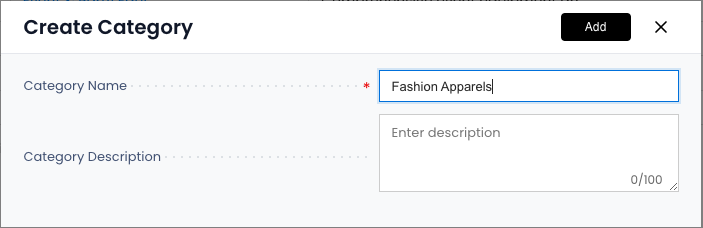
- Click Add category
- Category Name: Enter the name (e.g., “Electronics”, “Party Supplies”)
- Category Description: Add optional details about what belongs in this category
- Click Add
Edit a Category
- Find the category in your list → Click Edit
- Update the name or description → Click Save
Note: Some system-defined categories (pre-installed by Rentablez) cannot be edited or deleted to protect system stability.
Activate or Deactivate Categories
Toggle the status to Active (available for use) or Inactive (hidden from selection).
Inactive categories won’t appear when setting up assets, but existing categorized items keep their associations.
Add Custom Fields to a Category
Beyond a name and description, each category can carry its own Custom Fields — extra attributes that only make sense for that type of product. A “Cameras” category might capture Lens Mount, while “Vehicles” captures Fuel Type and Seating Capacity.
To get started, open the Custom Fields drawer from a category row. You can define fields of type Text, Number, Date, or Dropdown, mark any field as mandatory, and set a maximum length (for text) or the list of choices (for dropdowns).
Because these fields are tied to the category, every asset you create in that category is prompted for the same details — keeping your data consistent and searchable.
For the full walkthrough, see How to Add Custom Fields to a Category?.
Using Categories
When creating assets, assign them to a category so customers can filter by type.
Categories appear in your webstore and inventory filters, making it easier for customers to find what they need.